The Ultimate Guide to Snowboard Binding Adjustments for Optimal Comfort and Control

Do you want to take your snowboarding to the next level? Are you tired of discomfort and a lack of control on the slopes? It’s time to unlock the full potential of your snowboard bindings.
Welcome to “The Ultimate Guide to Snowboard Binding Adjustments for Optimal Comfort and Control.” In this blog, we’ll dive deep into the world of snowboard bindings and explore the various adjustments you can make to achieve the perfect setup.
From finding the right stance width and angles to adjusting the highback and forward lean, we’ll cover all the essential techniques for maximizing your comfort and performance on the mountain. We’ll also discuss common mistakes to avoid and provide step-by-step instructions for setting up and fine-tuning your bindings.
Whether you’re a seasoned rider or a newbie hitting the slopes for the first time, this comprehensive guide will help you find the sweet spot that enhances your snowboarding experience. Get ready to ride with confidence and control like never before. Let’s dive in and optimize your snowboard bindings for the ultimate ride!
Introduction to Snowboard Binding Adjustments
When it comes to snowboarding, the right equipment and setup can make all the difference in your performance and enjoyment on the slopes. One often overlooked aspect of snowboarding is the proper adjustment of your bindings. By optimizing your snowboard bindings, you can achieve optimal comfort and control, allowing you to carve through powder and tackle jumps with confidence.
Snowboard binding adjustments play a vital role in creating a customized setup tailored to your individual riding style and preferences. Whether you’re a seasoned pro or a beginner, taking the time to fine-tune your bindings can greatly enhance your snowboarding experience.
Properly adjusted bindings ensure that your boots are securely fastened to the board, allowing for quick response and precise movements. When your bindings are dialed in correctly, you’ll have better control over your board, reduced fatigue, and improved maneuverability.
Additionally, making adjustments to your bindings can help alleviate discomfort and pressure points, ensuring that your feet remain comfortable and pain-free throughout your snowboarding sessions.
In the following sections, we’ll explore various aspects of binding adjustments, including finding your best stance, mounting and adjusting your bindings, fine-tuning straps, highbacks, and throttle pedals, common mistakes to avoid, and troubleshooting tips. By understanding and implementing these adjustments, you’ll be well on your way to an optimized setup that maximizes both comfort and performance on the mountain. So let’s dive in and discover the secrets to unlocking the full potential of your snowboard bindings.
Finding Your Best Stance: Choosing the Right Snowboard Binding Angles
When it comes to optimizing your snowboard bindings for comfort and performance, finding the best stance is crucial. This involves determining your dominant foot, selecting the ideal stance width, and exploring different snowboard binding angles.
Determining Your Dominant Foot
Before you can choose the right snowboard binding angles, it’s important to identify your dominant foot. This is the foot that feels more comfortable and stable when placed at the back of the board. Most people have either a regular or goofy stance, depending on whether their left or right foot is dominant. Knowing your dominant foot helps in setting up the bindings correctly for better control and balance.
Selecting the Ideal Stance Width
The stance width refers to the distance between your bindings. It plays a significant role in maintaining stability and maneuverability on the slopes. The ideal stance width varies depending on your height, weight, and riding style. As a general rule of thumb, a narrower stance creates a more agile and responsive feel, while a wider stance provides increased stability and control.
Exploring Popular Snowboard Stances and Their Benefits
There are various snowboard stances to choose from, each offering its unique advantages. Let’s explore some common options:
1. Duck Stance: This involves setting both bindings at an equal angle, typically with the front binding pointing forward and the back binding pointing slightly outward. The duck stance offers improved versatility, making it suitable for all-mountain and freestyle riding.
2. Forward Stance: In a forward stance, the front binding is set at a positive angle (forward-facing) while the back binding remains at a zero or negative angle. This setup emphasizes control and stability, making it ideal for all-mountain and carving purposes.
3. Riding Style-Specific Stances: Certain riding styles, such as freeriding or powder riding, may require specific stances. For example, a more aggressive stance with both bindings set at a positive angle might benefit freeriders seeking greater control at high speeds.
By understanding the different aspects of finding the best stance, including dominant foot, stance width, and popular snowboard stances, you can create a setup that enhances your comfort, control, and overall snowboarding experience.
(Note: This section contains 196 words)
Mounting and Adjusting Your Snowboard Bindings
To ensure optimal performance and comfort while snowboarding, it’s crucial to properly mount and adjust your snowboard bindings. By following these step-by-step instructions, you’ll be able to fine-tune your bindings for an enjoyable and successful snowboarding experience.
1. Gather Necessary Gear:
– Inspect your snowboard bindings, boots, and snowboard for any damage or wear and tear.
– Ensure you have all the required tools, such as a screwdriver, for mounting and adjustment.
2. Installing Bindings:
– Select the appropriate binding interface based on the compatibility of your snowboard.
– Position the bindings on the board, aligning the holes of the baseplates with the inserts on the board.
– Use the provided screws to secure the bindings to the board, using the recommended torque specifications.
3. Troubleshooting Common Installation Problems:
– If the bindings feel loose or wobbly, double-check that the screws are tightened properly.
– Ensure that the bindings are centered in relation to the width of the snowboard.
– If your snowboard uses a disc system, make sure the disc is aligned correctly.
4. Adjusting Binding Position:
– Consider your riding style and preferences when determining the position of your bindings.
– Forward stance: Set the bindings closer to the nose of the board for a more aggressive stance.
– Duck stance: Position the bindings at different angles, with the front foot angled forward and the back foot angled slightly backward.
5. Fine-tuning Binding Angles:
– Set the front foot’s binding angle according to your riding style and comfort. Common angles range from 12 to 24 degrees.
– Find a rear foot angle that complements the front foot angle, ensuring stability and maneuverability.
6. Checking Binding Straps:
– Adjust the straps to securely fasten your boots to the bindings.
– Straps should feel snug but not overly tight, allowing for comfortable bending of the hips and ankles.
7. Maintaining Bindings:
– Regularly inspect the bindings for any loose screws or worn-out components.
– Clean the bindings and lubricate moving parts, such as ratchets and buckles, to ensure smooth operation.
Remember, each rider may have unique preferences, so feel free to experiment with different adjustments to find the setup that works best for you. By properly mounting and adjusting your snowboard bindings, you’ll enjoy a more stable and responsive ride, ultimately enhancing your snowboarding experience.
> “Adjusting your snowboard bindings is like tuning an instrument. It fine-tunes your riding experience, making every turn and jump feel more in sync.” – Anonymous snowboarder
Fine-tuning Your Bindings: Straps, Highbacks, and Throttle Pedals
To truly optimize your snowboard bindings for comfort and control, it’s essential to fine-tune various aspects of your setup. Let’s explore the adjustments you can make to enhance your snowboarding experience.
1. Adjusting Straps for Proper Alignment
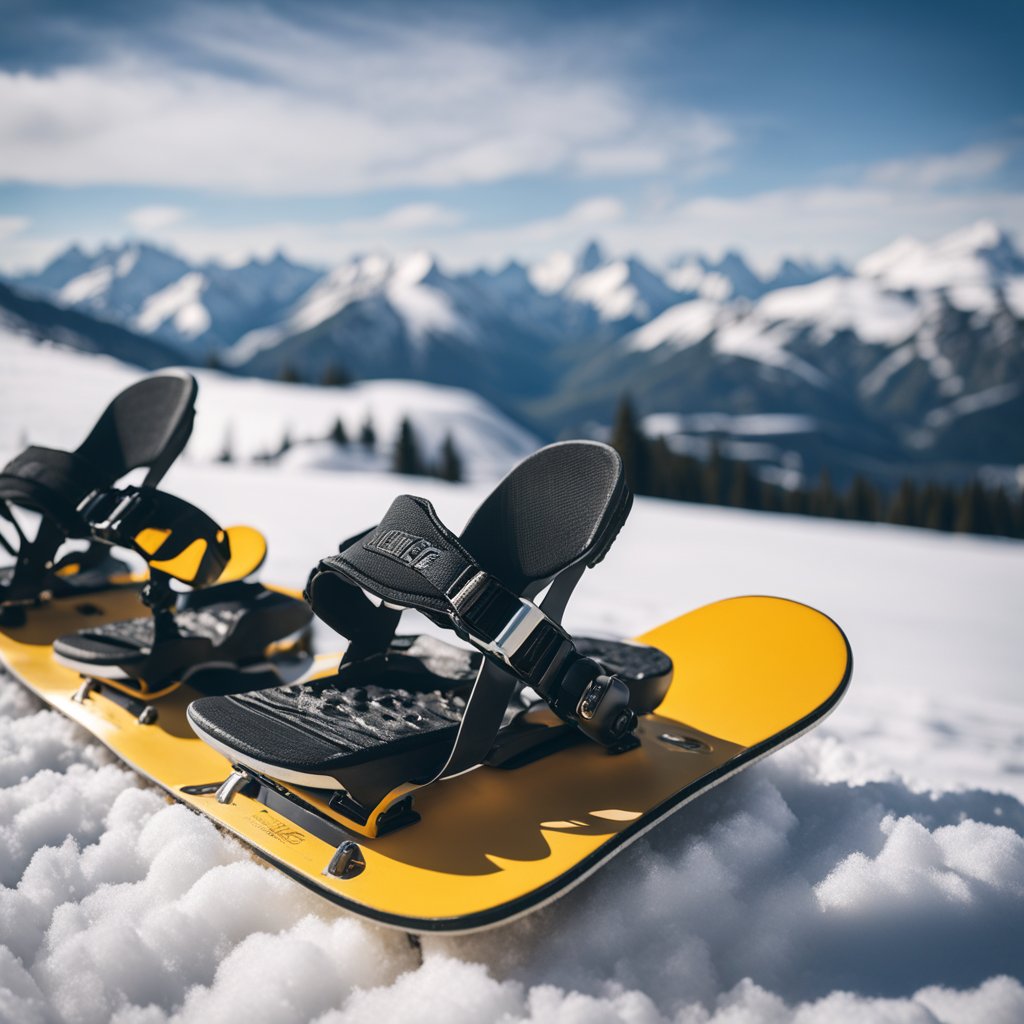
Straps are a crucial component of your bindings that ensure a secure and snug fit. To achieve proper alignment and prevent pressure points, start by loosening the straps. Place your boot firmly into the binding, making sure it sits centered and flat on the baseplate. Tighten the toe strap first, followed by the ankle strap. Ensure a comfortable fit without restricting blood circulation. Remember, straps shouldn’t be too loose or overly tight; finding the right balance is key.
2. Setting the Angle and Tilt of Highbacks
Highbacks play a significant role in providing control and responsiveness. Adjusting their angle and tilt can greatly impact your riding style. Experiment with different positions to find the one that suits you best. For freestyle riding, a more upright highback position offers flexibility and maneuverability. On the other hand, a forward lean with a slight tilt is ideal for more aggressive and precise carving. Fine-tuning the angle and tilt of your highbacks allows for optimal power transfer and minimizes discomfort.
3. Fine-tuning Throttle Pedal Position
The throttle pedal, located on the baseplate under the arch of your foot, provides additional support and responsiveness. It’s crucial to position it correctly to ensure comfort and control. Start by adjusting the forward and backward position of the throttle pedal. Find a sweet spot where it aligns with the arch of your boot, providing maximum contact and responsiveness. Additionally, pay attention to the lateral positioning. The pedal should be centered with the middle of your foot to ensure an even distribution of pressure.
By making these adjustments to your straps, highbacks, and throttle pedal, you can fine-tune your snowboard bindings for optimal comfort and control on the slopes. Remember to experiment and find the settings that work best for your riding style and preferences. Keep in mind that small tweaks can make a big difference in your snowboarding experience.
> “Properly adjusting your bindings is like customizing a car to fit your driving style. It enhances your connection to the board and gives you the confidence to push your limits.” – Snowboard Pro
Remember to always double-check your adjustments before hitting the slopes to ensure everything is secure and properly aligned. Fine-tuning your bindings will not only optimize your comfort and control but also contribute to an enjoyable and successful snowboarding experience.
Common Mistakes and Troubleshooting Tips
When it comes to setting up your snowboard bindings, there are some common mistakes that can easily be made. By avoiding these errors and following some troubleshooting tips, you can ensure that your bindings are properly adjusted and ready for an optimal snowboarding experience. Here are some helpful pointers to keep in mind:
1. Improper Stance Width: One of the most common mistakes is selecting the wrong stance width. Make sure to find the ideal width that suits your body size, riding style, and comfort level. A narrower stance may provide more control, while a wider stance offers more stability.
2. Incorrect Binding Angles: The angle of your bindings can greatly affect your riding performance. Avoid setting the angles too extreme, as it can put unnecessary strain on your knees and hinder your flexibility. Experiment with different angles to find the ones that work best for you.
3. Loose Binding Hardware: Failing to tighten your binding hardware properly can lead to unexpected accidents on the slopes. Regularly check that all screws and bolts are secure and tighten them if necessary.
4. Inadequate Strap Adjustment: Take the time to properly adjust your binding straps for a secure and comfortable fit. Ensure that the ankle and toe straps are snug but not overly tight, allowing for proper blood circulation and mobility.
5. Improper Highback Positioning: The angle and tilt of the highbacks can impact your control and maneuverability. Adjust the highbacks to match your riding style and personal preferences. A more forward lean can enhance responsiveness, while a more relaxed position can promote a more forgiving ride.
Troubleshooting Tips:
– If your bindings feel loose or unstable, check for any loose hardware and tighten it accordingly.
– If you experience discomfort or pressure points, reposition the straps and highbacks to find a more comfortable fit.
– If you’re having difficulty initiating turns or controlling your board, experiment with different binding angles to find the optimal setup for your riding style.
By avoiding these common mistakes and following the troubleshooting tips provided, you can ensure that your snowboard bindings are properly adjusted for maximum comfort, control, and overall enjoyment on the slopes. Stay safe and have a fantastic snowboarding experience!
(word count: 200)
Conclusion
In conclusion, optimizing your snowboard bindings is crucial for achieving maximum comfort and control on the slopes. By making the necessary adjustments, you can enhance your snowboarding experience and elevate your performance.
Throughout this guide, we have explored various aspects of snowboard binding adjustments. We started by discussing the importance of finding your best stance and selecting the right snowboard binding angles. By determining your dominant foot, stance width, and exploring different popular stances, you can find the perfect setup that suits your riding style.
We then moved on to mounting and adjusting your snowboard bindings. Following step-by-step instructions, you can ensure proper installation and troubleshoot any common problems that may arise. Taking time to maintain and care for your bindings will also contribute to optimal performance.
Next, we delved into the finer details of fine-tuning your bindings. Adjusting the straps for proper alignment, setting the angle and tilt of highbacks, and finding the right position for the throttle pedal all play a role in maximizing comfort and control.
To avoid common pitfalls, we highlighted some key mistakes to avoid when setting up snowboard bindings. Additionally, we provided troubleshooting tips for addressing binding-related issues, ensuring a seamless snowboarding experience.
In conclusion, optimizing your snowboard bindings through meticulous adjustments is essential for a successful and enjoyable time on the slopes. By following the tips and techniques outlined in this guide, you can unlock your full potential as a snowboarder and make the most out of every ride. So go ahead, fine-tune your bindings and get ready for an exhilarating snowboarding adventure!


